Summary
Interpretation = creation. On the road to notation.
Interpretation is the creation / re-creation of the interpreter’s own story through a piece composed by another. The interpretation of graphic scores for children, can be a gateway leading to the creation and composition of a contemporary piece.
Duration: 4 x 30 min
Age: from age 6
Key words creativity and entrepreneurship: Imagination, Transformation in organization, Tolerate failure, Working in teams, Development of ideas and solutions
Step 1 Interpretive path (of a graphic score)
“Who tells what? why and how? ”
- Analyze the composition = know the story the piece wants to tell
- Create your own version of a story = beginnings of creation
- Deciding on the interpretation = how to turn the story into music?
- Practice, repeat = listen
- Presentation = telling others
Step 2 Towards a graphic notation
- Draw the sound you make with your mouth in space with a hand gesture
- Draw, write
Description
Step 1 Interpretive path (of a graphic score) Who tells what? Why and how?

1. Analyze the composition = know what the piece wants to tell
Research and analysis of the play that the children will interpret.
It is not only a matter of working on the score, but of understanding the context that surrounds the piece, and the composer. Understanding the “who ” is importantly, to understand its language. To know the life of the composer in question, (e.g. his culture, at what point in his life the piece was composed, why and for whom it was composed? What political or religious influences? What other artistic influences?).
It is interesting to work with children in a way that allows the teacher to bring the different subjects taught in class together in a project.
These experiments will lead children to create their own languages to express their personality, desires, feelings ….etc. in future compositions.
“Why”: reasons and the composer’s intentions are important for creation.
Once the children know the composer’s ideas and his language, it is possible to start analysing the piece via the score.
“What”: what does the composer say? The title of the play can often be a starting point.
“How”: to make a rather technical observation and analysis of the score.
This is a question of cataloging the different signals in the score, corresponding to the tempo, the Time of the notes, the dynamics, the heights, the articulations, the colours… this observation or analysis will give the children ideas of how to write graphic scores later in their composition.
2. Create your own version of a story = beginnings of creation
Children can create stories to tell from the piece they have studied.
- Begin by creating an overall picture of the piece, always taking into account and respecting the composer’s story “me, what I’m saying… ». This could be in the form of a poem.
- Then we will specify details of precise moments in the piece, always alongside the score. Make note of keywords in the score if necessary.
Ideas can also be expressed in colour, through words, with adjectives or verbs, in both concrete and abstract ways.
3. Deciding on the interpretation = how to turn the story into music?
- If the graphic score that the children are interpreting already has precise indications about the instruments to be used and the modes of play, they can begin to think directly on how they might play or sing to express what they had chosen during the previous phase of work.
- If elements of their interpretation such as choice of instrument and modes of play are unstated in the score, the children should first choose which instruments and modes of play they will use for each part of their story.
4. Practice, repeat = listen
5. Presentation = telling others
Step 2 Towards a graphic notation

- Draw the sound you make with your mouth in space with a hand gesture

Take an imaginary pencil and start drawing big waves and tiny waves.
Between the sea and the sky there is a small line, we’re going to sing like a thread.
I put my pencil at the top. Everyone should draw the same line at the same height
Then we will do some scribbling.
Anyone can propose a drawing.
A pupil offers to draw a fire engine. Everyone draws a gesture that guides the voice. And put in the siren!
Another suggests sand (rubbing hands)
And we end with yawns to finish
- After vocalising, draw an imaginary line with the hand and follow it with a sound (whichever pitch), so that all together it forms a cluster
- Next install the imagery, drawing in the air with the hand, small hills, waves and follow the undulations of the line with the voice
- Make big mountains, big waves and follow in the same way
- Make rockets gestures
- Make gestures like stars
- Ask the children to invent gestures from their imaginations
- Draw, write

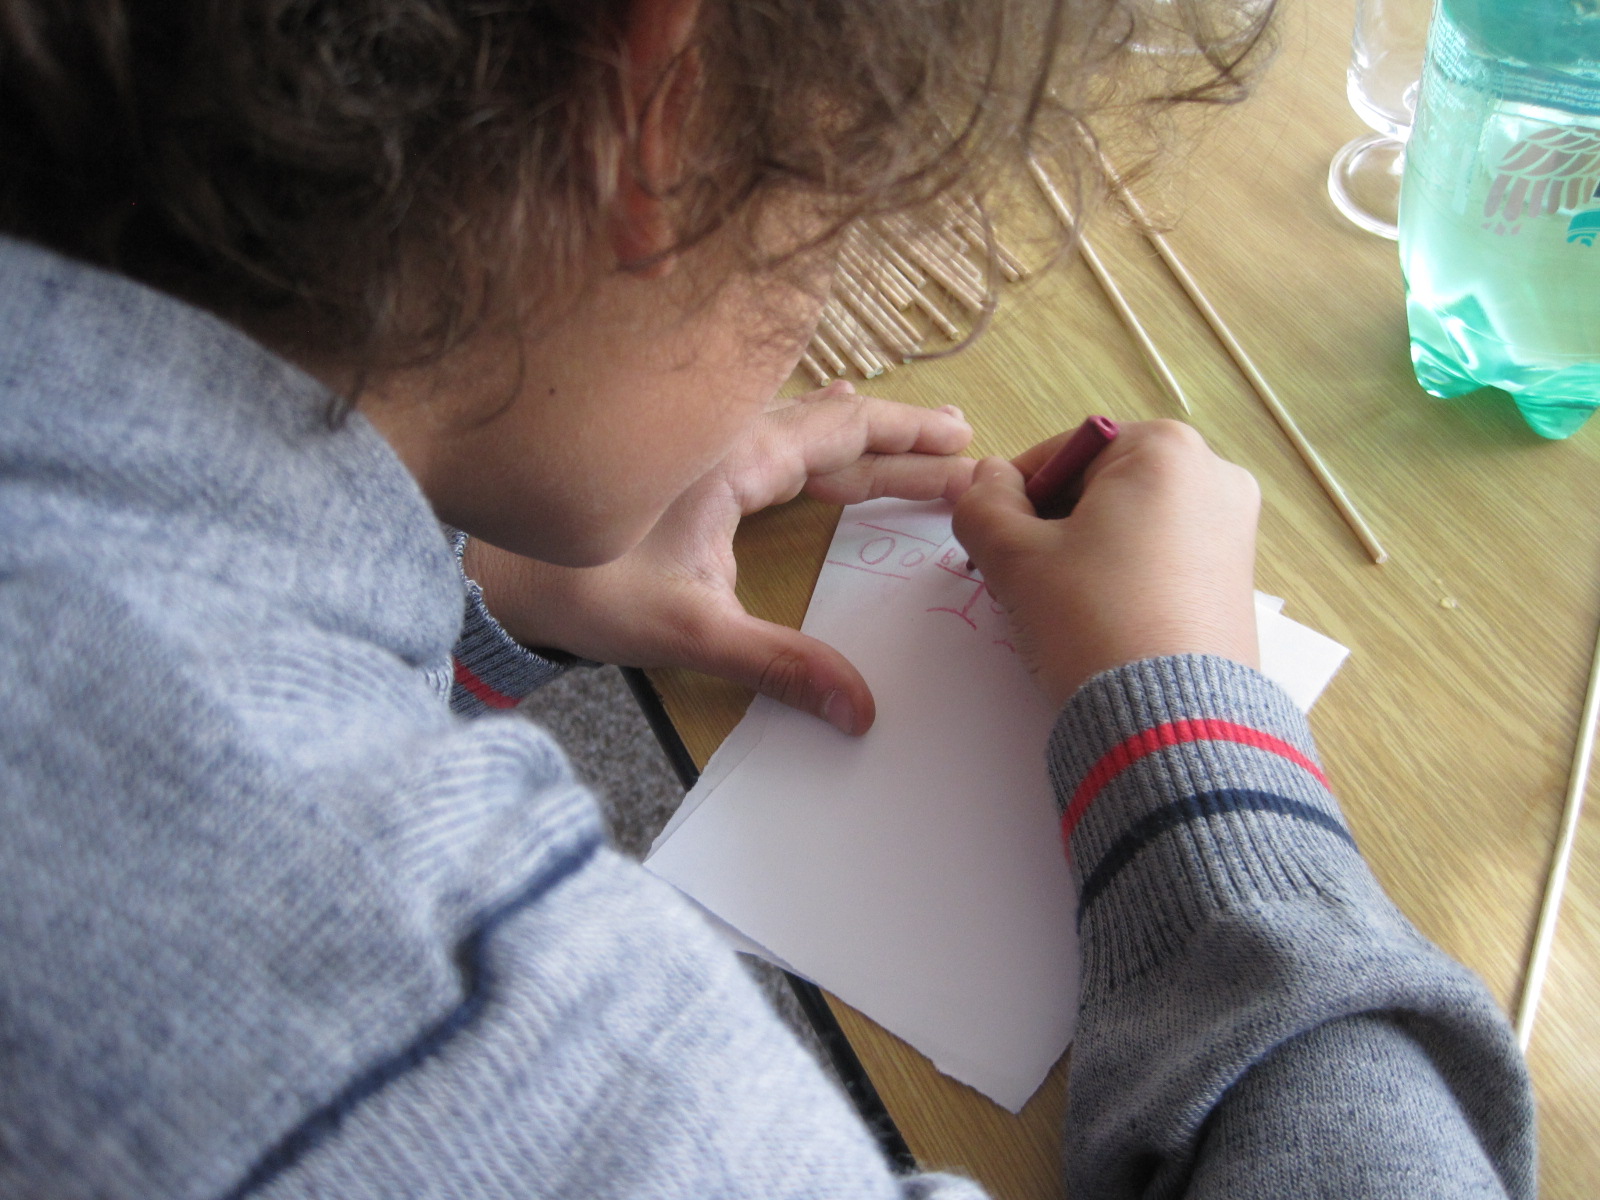
Draw sounds
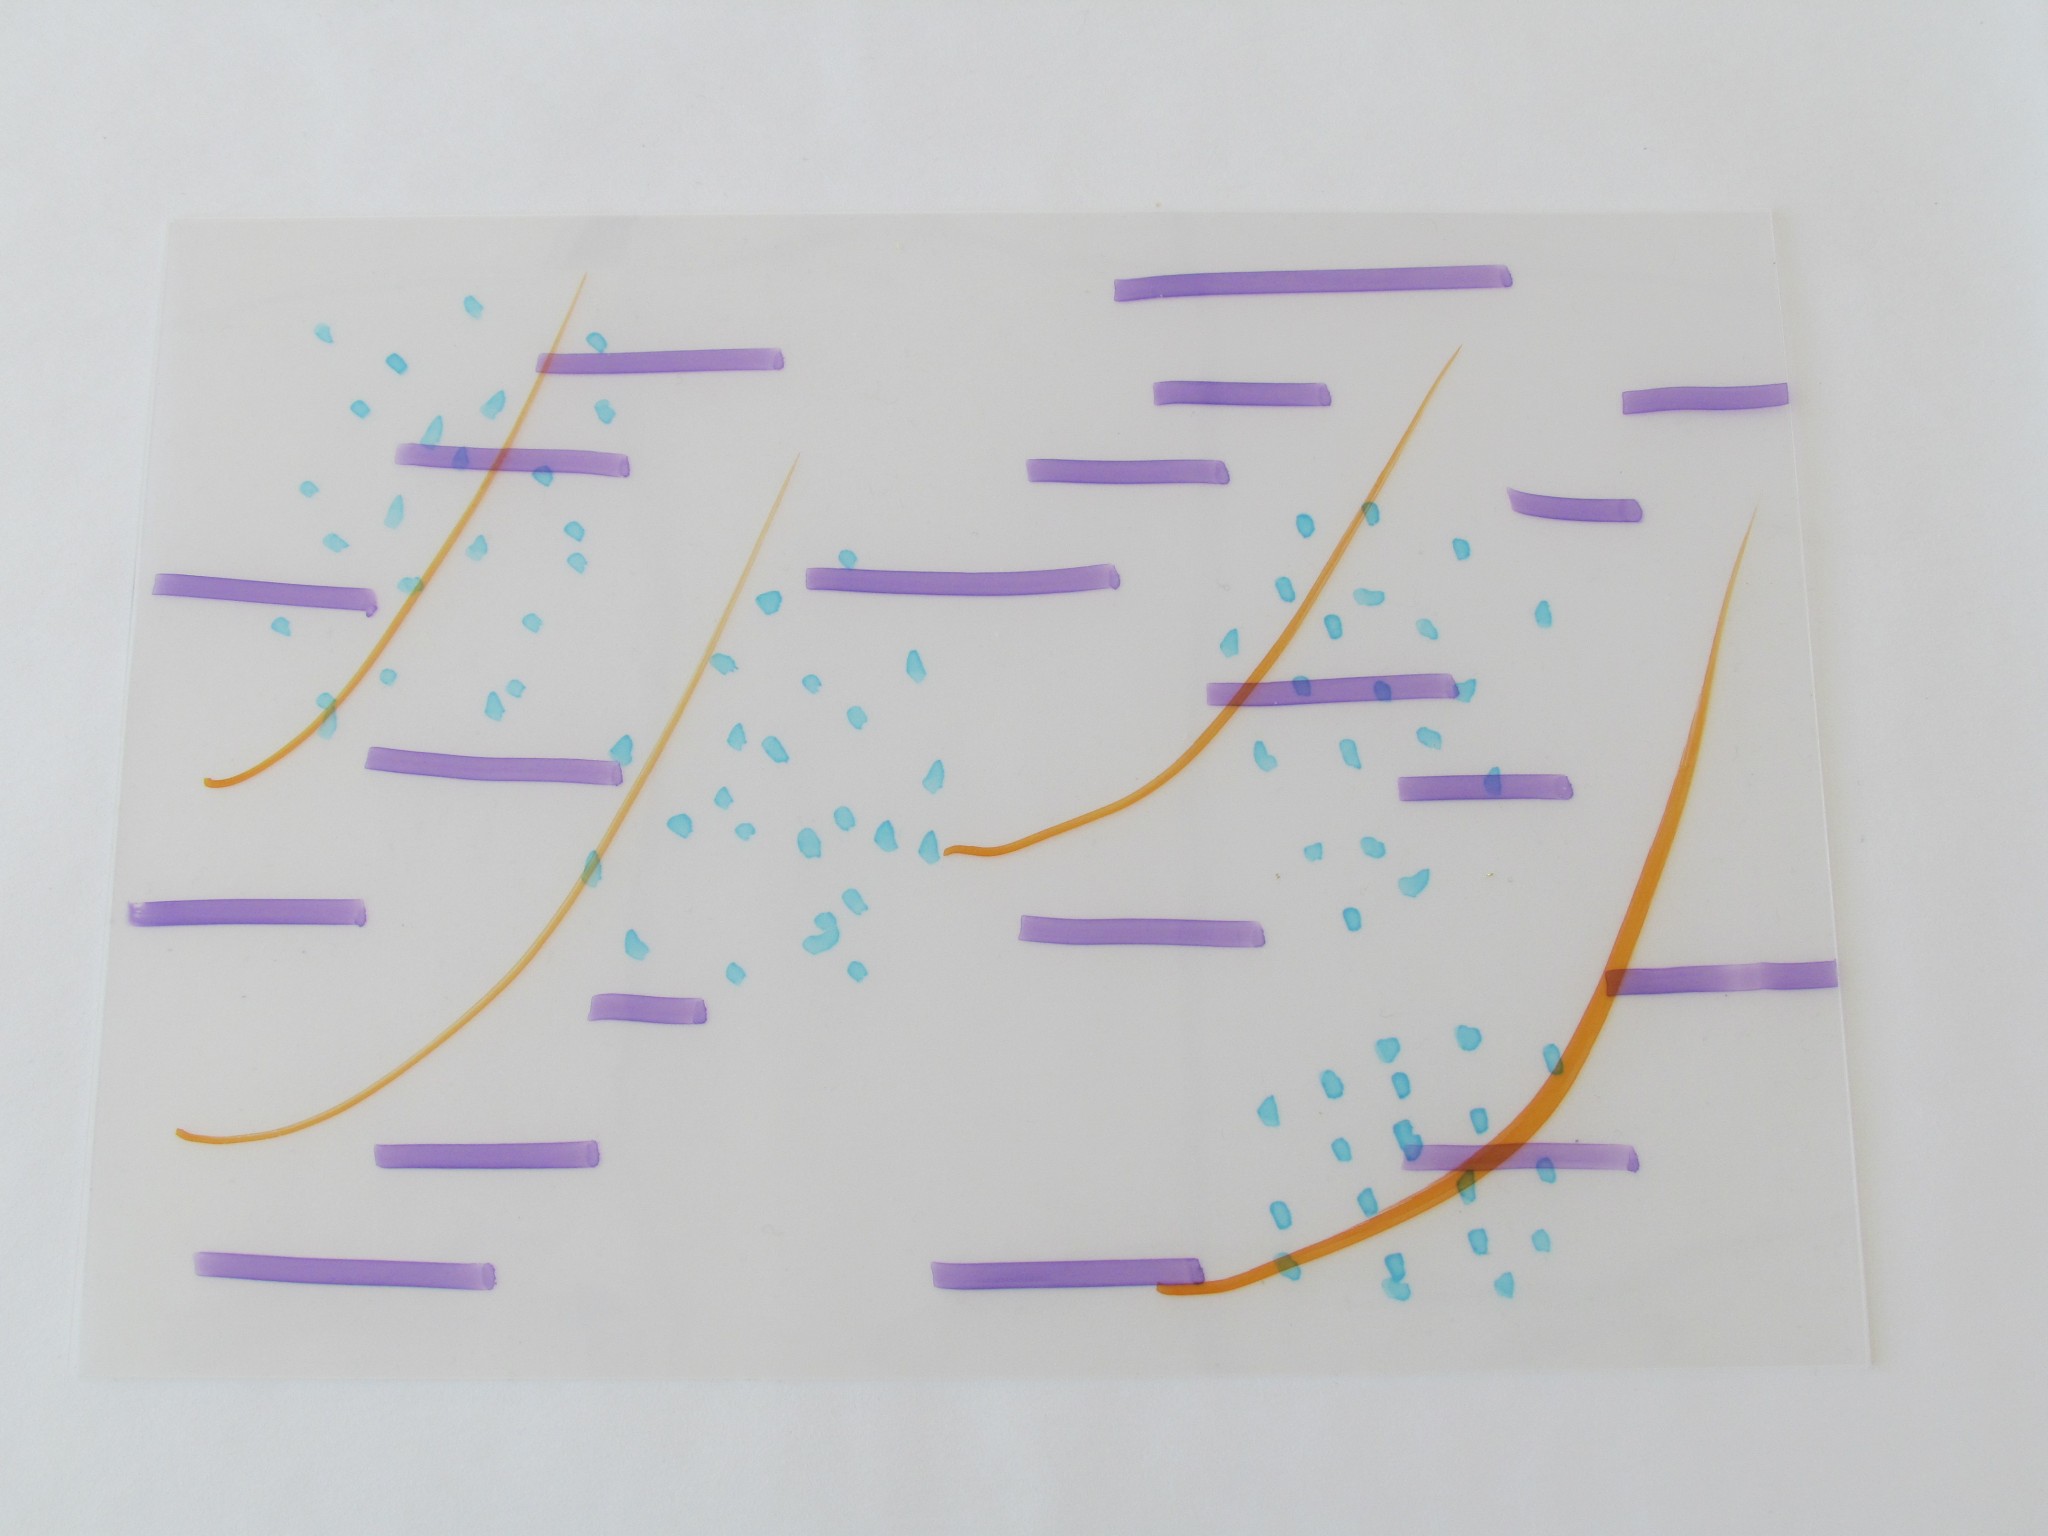
- Draw one of the previous gestures on a transparent sheet
- Show and then ask the group to realize what has been drawn, making sure that the intended interpretation is the notation, and adjust if necessary the notation
- Overlay several transparent elements, each selected on the basis of that interpretation
- Form groups according to patterns, voice play roles
- Apply to a sound body
- Associate a graphic to a sound, and ways to play. Specify how (for voices and / or a specific instruments or sound body, with or without specific ways to play, etc.)
Share the sheets: define the reading mode
- Random, open form in which one walks as in a painting
- Read from left to right, top to bottom or other
- Define codes related to musical parameters (height, time, intensity, density, dynamics, simultaneity, etc.): colour, line thickness, density, etc.
Draw the shape, the construction of the composition
- Make a choice of graphics, notation
- Depending on the choice of the reading style (from left to right or otherwise), arrange the graphics / notations on the sheet or the table, according to the sequence, the superposition, the succession etc. of the musical events
- Each student or group of students should take responsibility for a graphic
- Execute the piece: the student (or a student from the student group who imagined and made the notation), should direct the play, guide the reading process in time, by moving his arm to the score
- Enrich the dynamic timbre, playing modes, silences, variation of pitch and tempo, etc.
To promote graphic inspiration and imagination:
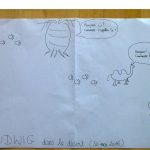
- Fill imaginary language bubbles (+ cf vocal improvisations)
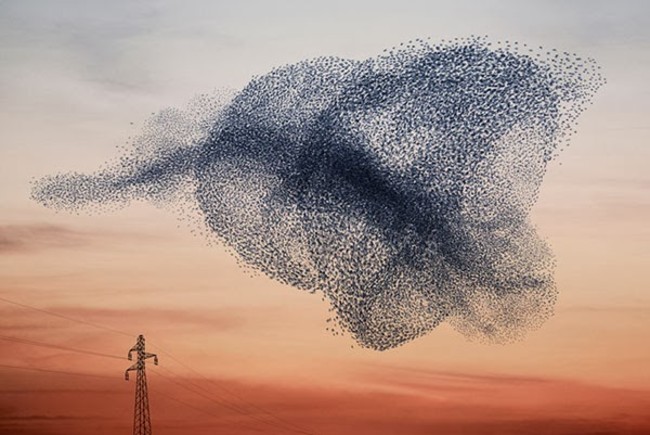
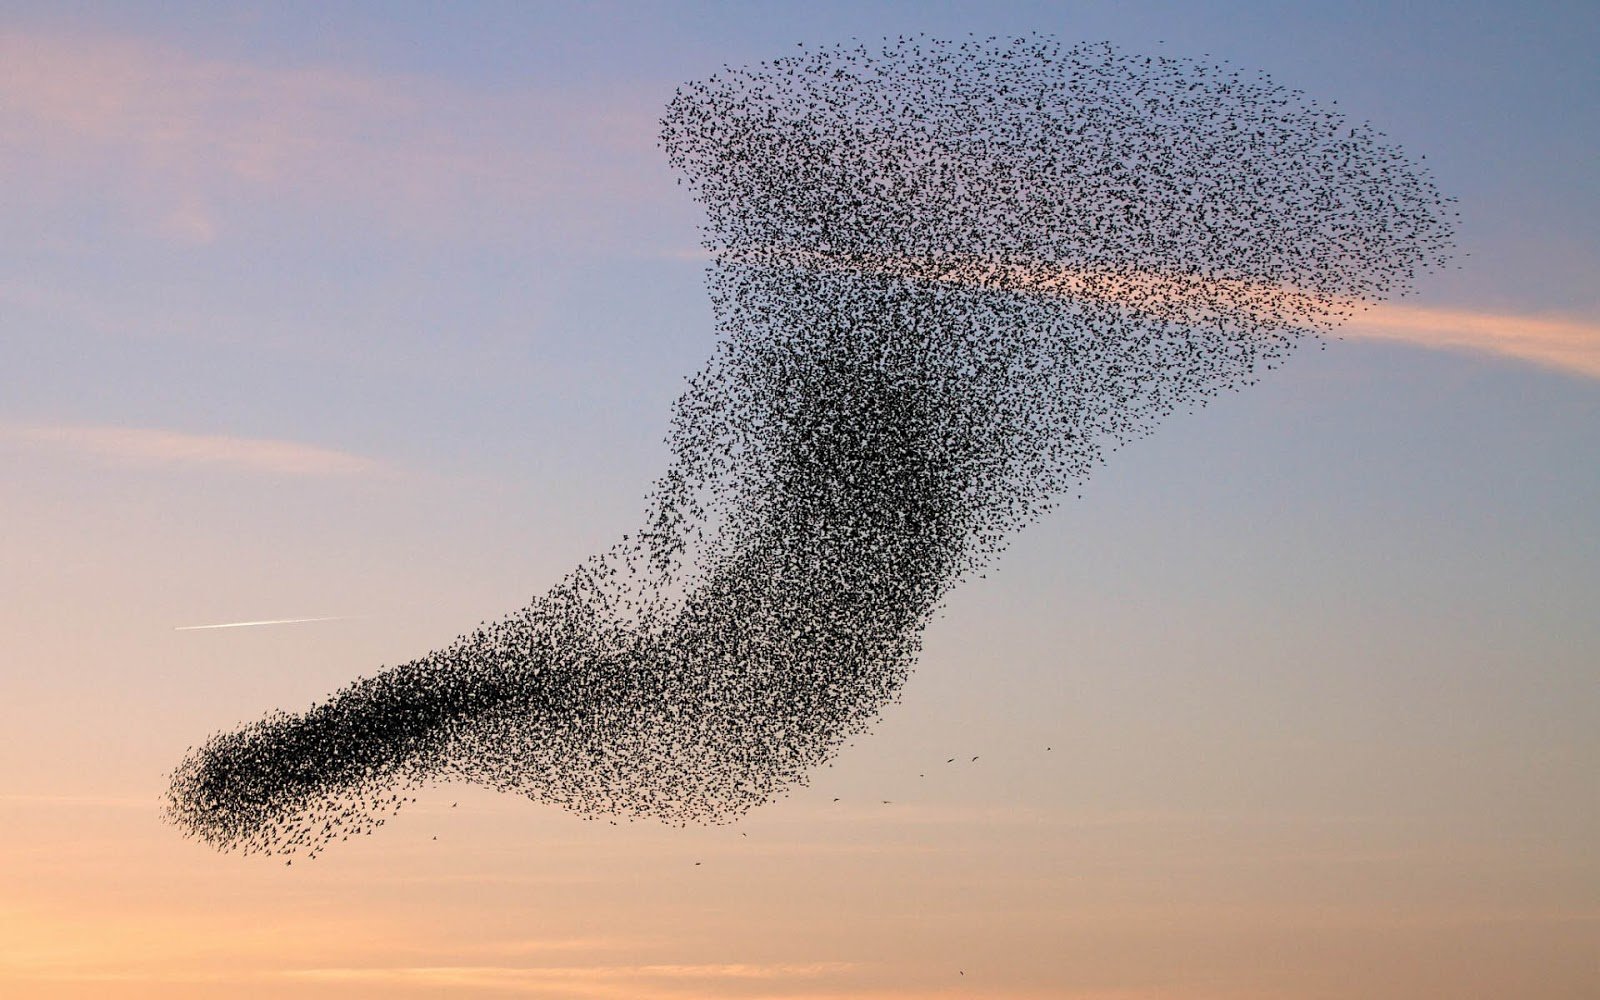
- Photos of flocks of birds
- Find more inspirational designs, graphics, pictures, etc.
Exemples bulles 1 Exemples bulles 2 Bulle vierge 1 Bulle vierge 2
- Photos of flocks of birds to inspire for example the graphic associated with a cluster of sounds
- Search for other patterns, graphics, photos, etc. to inspire
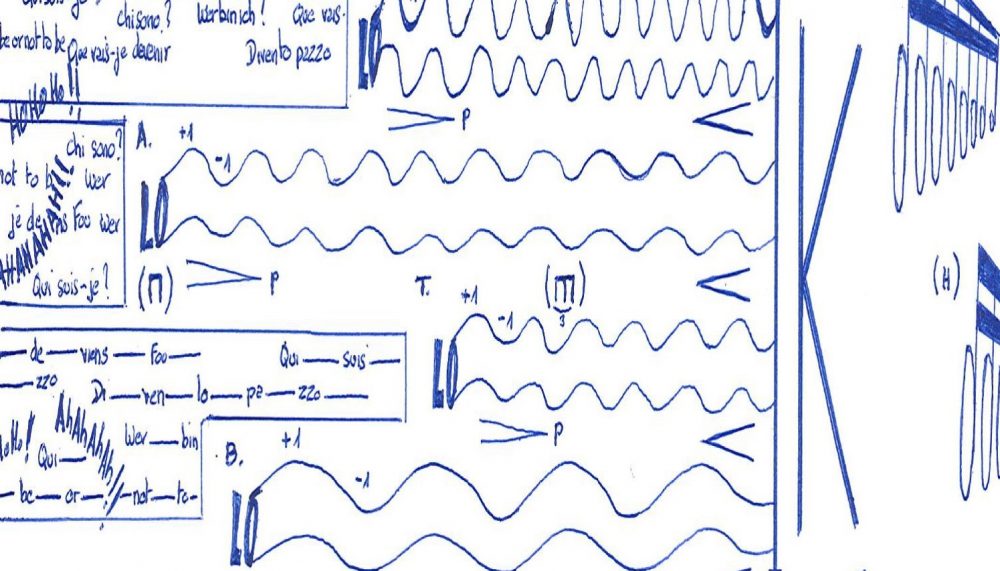
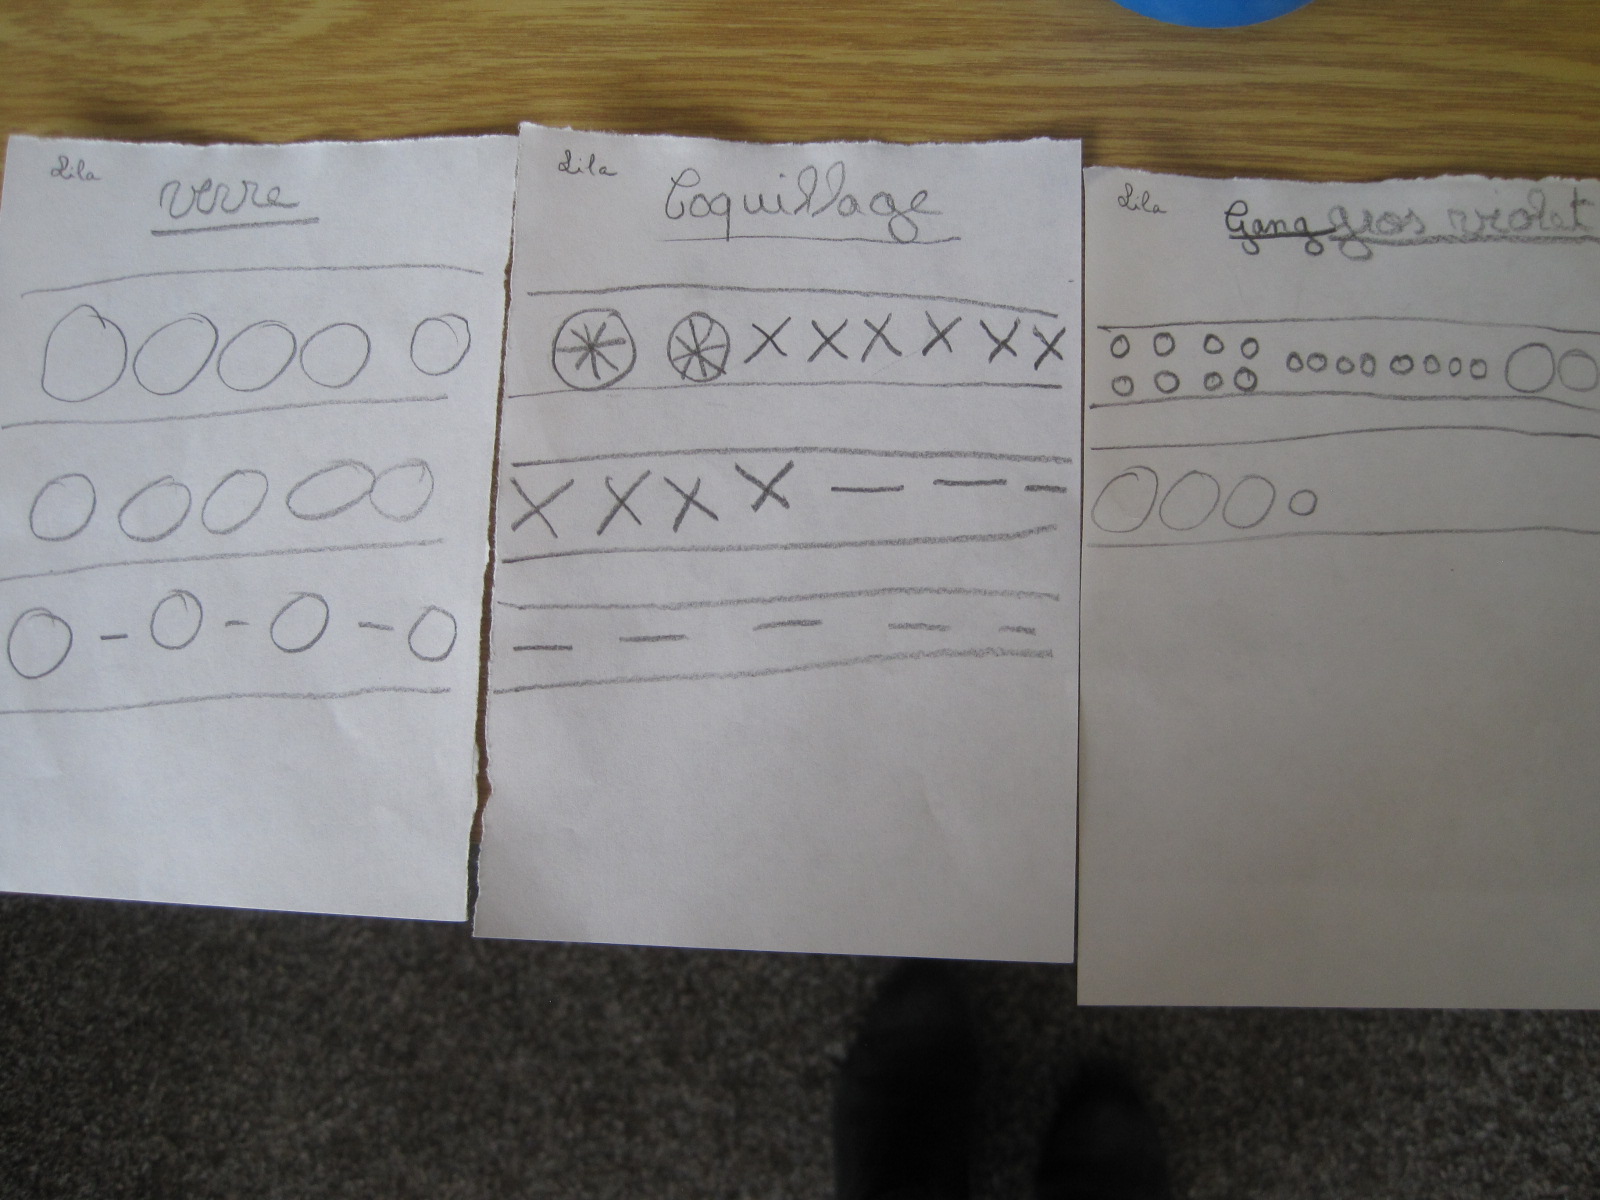
Examples of graphics by students
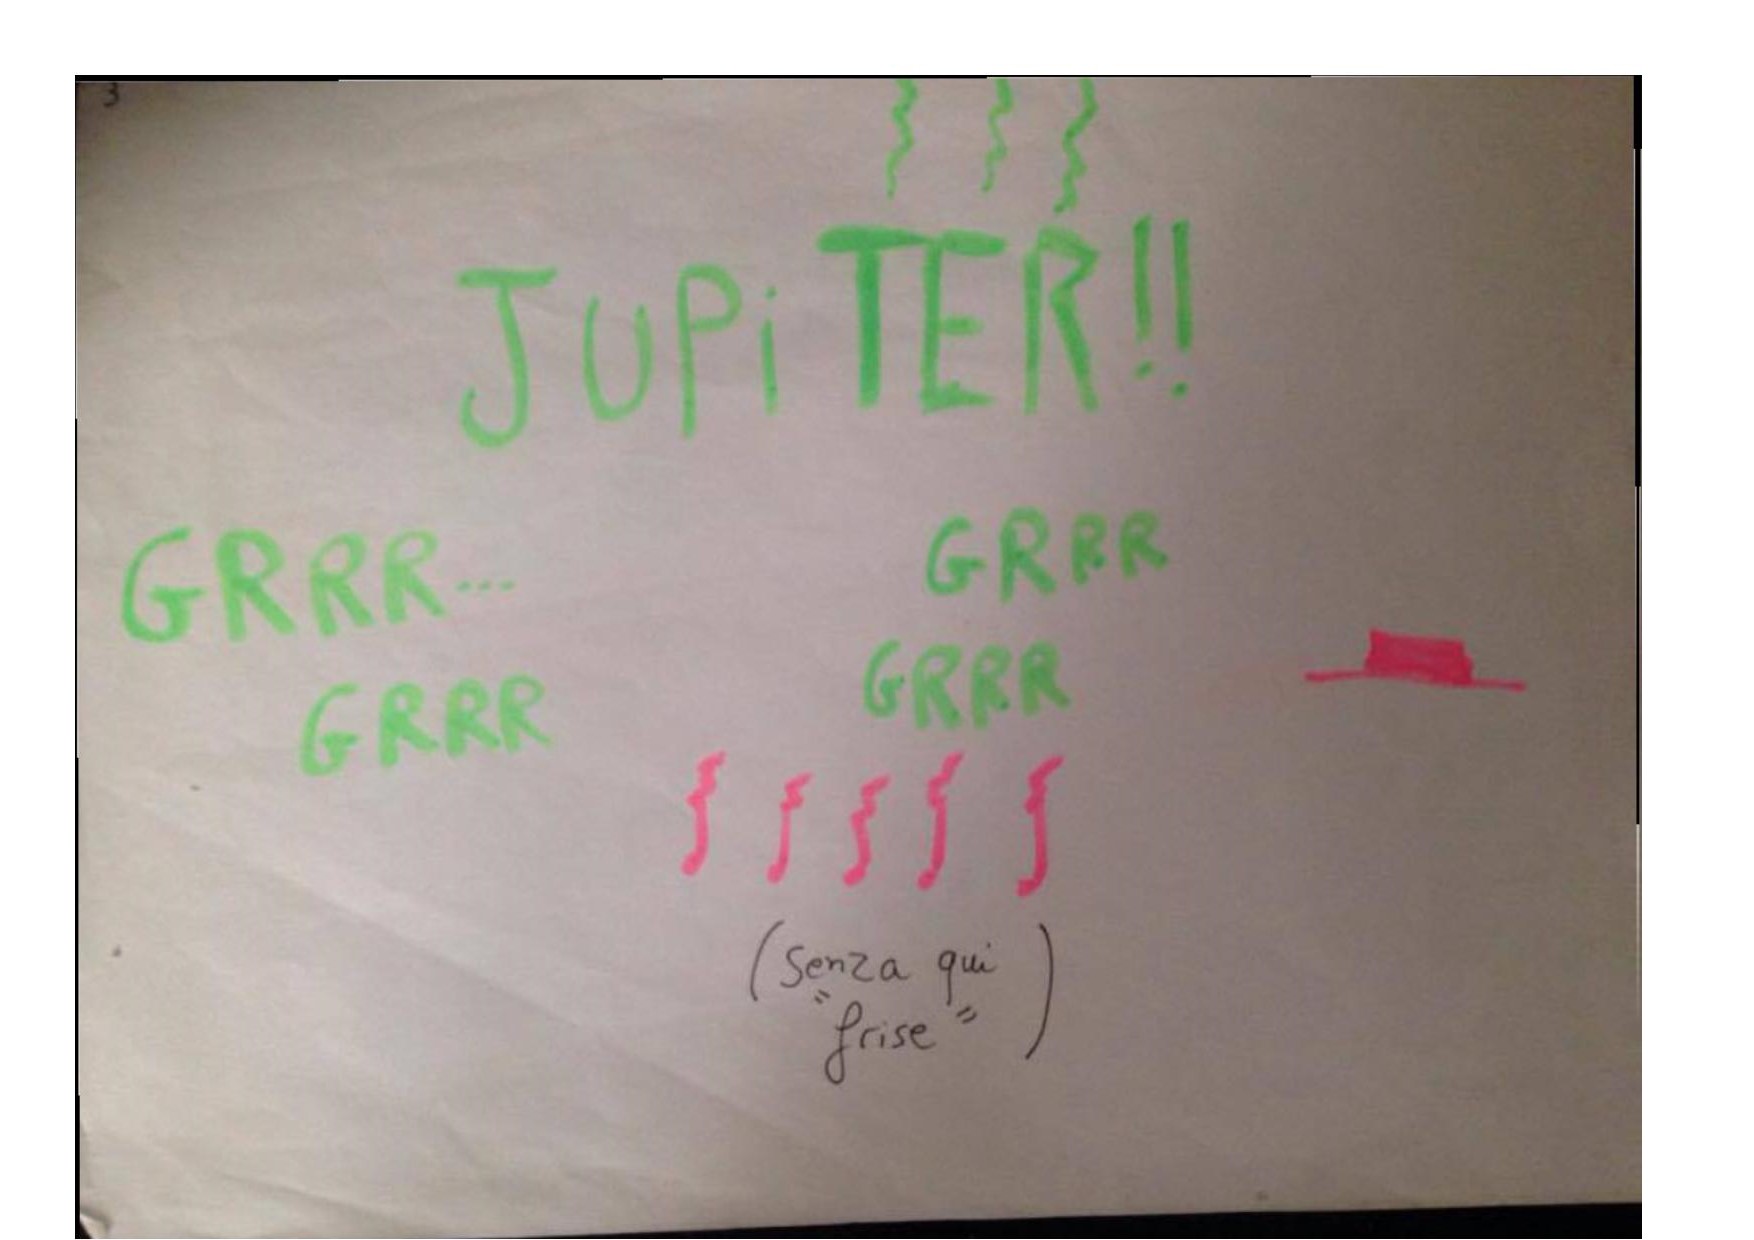
“Haiku of the solar system”

Notation in an organized form with playing modes:

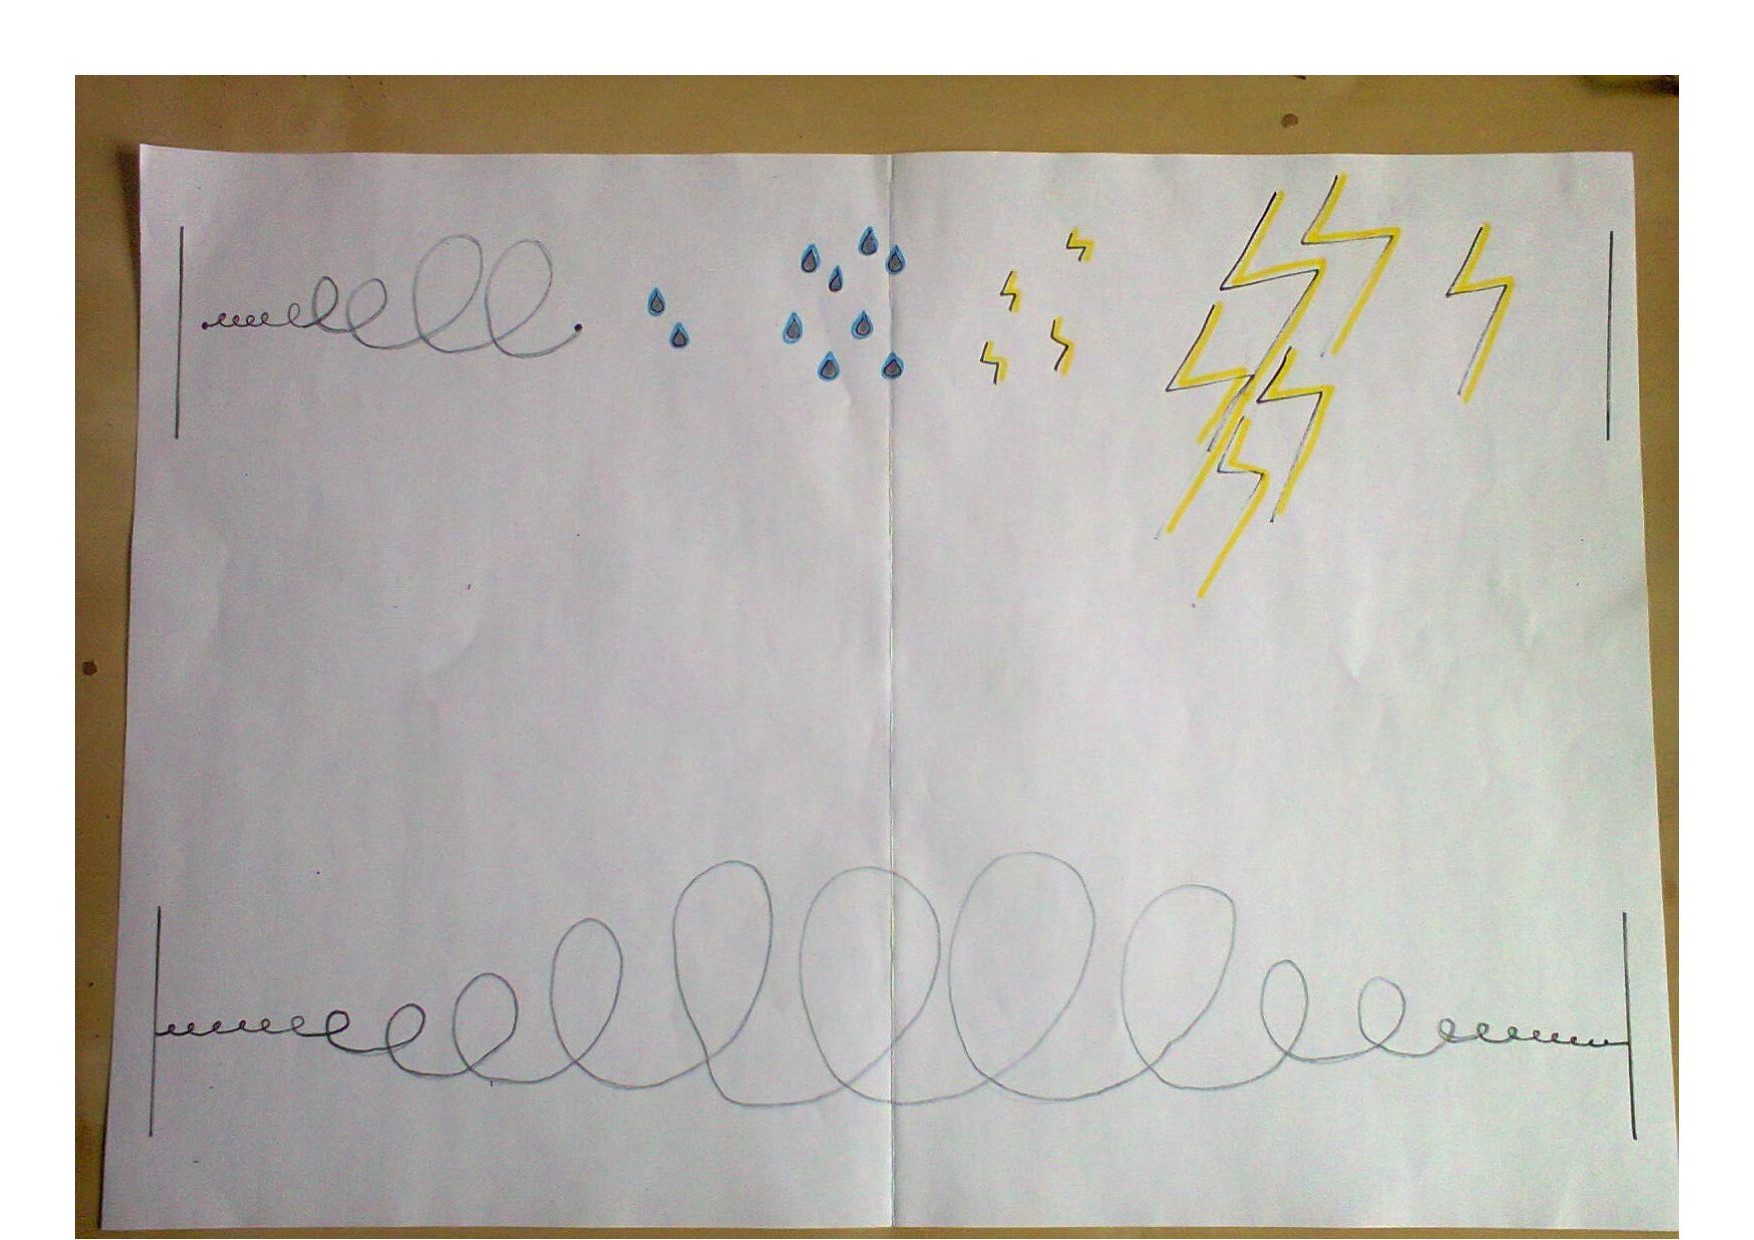
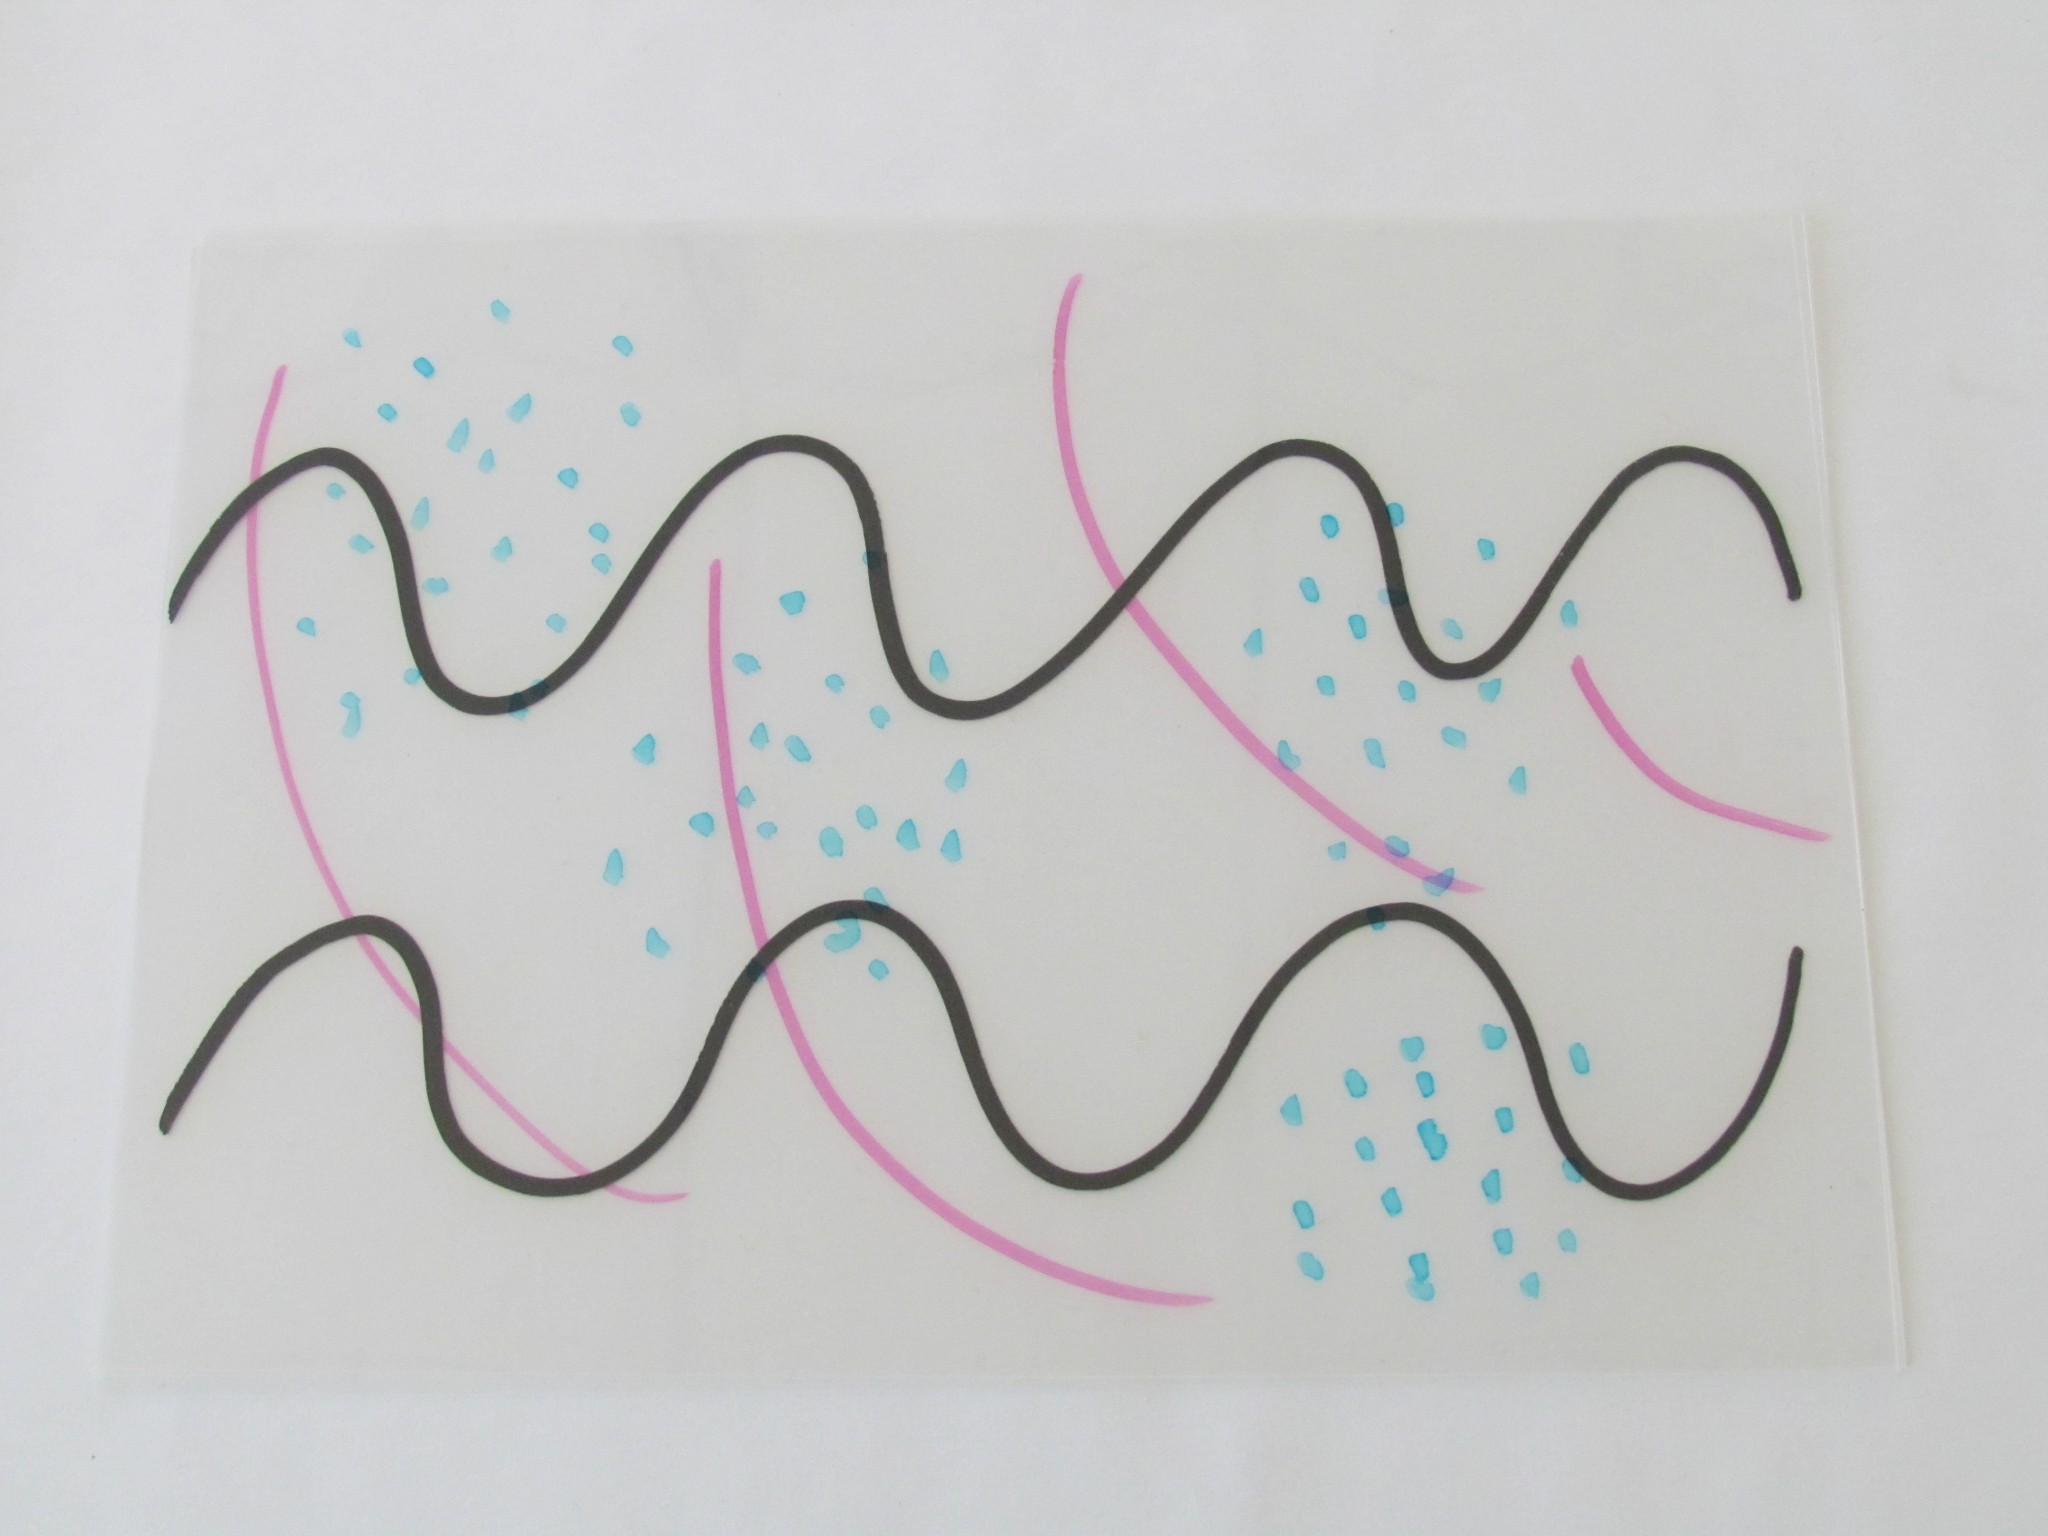
The graphic score of the “The Thunderstorm” piece, in polyphony
(Group 1 above, group 2 below)
Score for “The Desert” piece (which is linked to the show to the Burkinabe song “Moriba Yassa”, symbolized by the G-clef symbol)
Student graphics and sound production
Competencies
The pupils are able to:
- create their own languages;
- express in their compositions their personality, their desires, their feelings, their questions, etc…
References
Examples of graphic scores, videos of interpretation of graphic pieces, graphics and films inspiring the production of sound
- György Ligeti Artikulation (audio with graphic score to follow)
- John Cage Aria
- Creamus Écrire le son
- Cathy Berberian Stripsody
- Search online: enter the “graphic scores” keywords in a search engine
- Saul Steinberg: L’Écriture visuelle/Visual Writing
- Onomatopoeias of cartoons and animations
- Original cartoons and animations
- Add sounds to a silent film
Module Overview
|