Summary
Introduction to modest instrument making
Léo Maurel, instrument maker : During a classroom music session, the use of musical instruments can be very valuable.
And why not make them yourself? Because the instrument has somehow already imagined the music, imagine what incongruous sounds it could contain, as a gesture to play an instrument, as a way of presenting sound to a listener. Because the instruments that you can buy are sometimes too expensive or simply not available.
By using recycled materials, one realizes that it is possible to manufacture instruments with almost anything or just a few resources.
Moreover, making them yourself helps you to understand acoustic principles and these instruments often encourage innovation in the field of the creation of music.
If you can make an object that makes a sound, why not invent one yourself? After all, every day, we are surrounded by sounds; of a creaking door, a pan tinkling sound of a pan, a plastic pipe that resonates, the rustling of paper.
This module offers a tutorial for the construction of the following instruments :
- Instrument 1 – FROG / guiro (scraper) + harmonic pipe
Duration: 15 min / age: from age 10
- Instrument 2 – OCARINETTE (tin can-ocarina)
Duration: 15 min / age: from age 8
- Instrument 3 – PAPER CLAVES ( + kazoo and papellophone)
Duration: 40 min / age: from age 12
- Instrument 4 – BOTTLE-BELLS (pressurized cylinders)
Duration: 5 min / age: from age 15
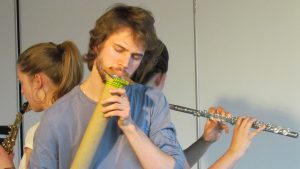
- Instrument 5 – CD-FLUTE
Duration: 20 min / age: from age 8
- Instrument 6 – POT-BALLOONS (+ shaker)
Duration: 5 min / age: from age 6
- Instrument 7 – MALLETS
Duration: 20 min / from age 12
- Instrument 8 – RECYCLED DRUM
Duration: 15 min / age: from age 6
- Instrument 9 – RECYCLED CHIMES
Duration: 5 min / age: from age 6
- Instrument 10 – COWBELLS (rattles)
Duration: 20 min / age: from age 12
- Instrument 11 – FLÛT’HORN (flute “membrane”)
Duration: 25 min / age: from age 15
- Instrument 12 – BOTTLE-SPIDERS (or “agitophones”)
Duration: 15 min / age: from age 6
- Instrument 13 – MAKESHIFT BOW
Duration: 20 min / age: from age 12
Key words creativity and entrepreneurship: Transformation in production, Persistence, Tolerate failure, Sensibility for problems diversity, Production and overtaking the risks
Description
Instrument 1: FROG / guiro (scraper) + harmonic pipe
Duration: 15 min / age: from age 10

Recycled
- Solid wood off-cuts of small thickness (laths, etc.)
- Thin sticks (wood, metal etc.)
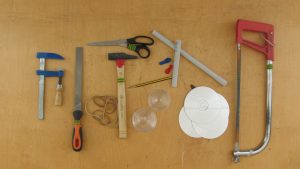
Tools
- Saw
- Round file
(1) Once the wood is cut to the correct size (± 3 x 15 cm),make a series of grooves with the file about 2/3 of the length
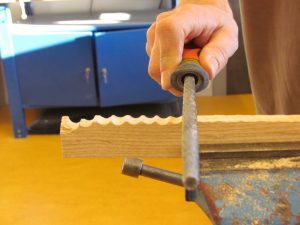
(2) …Thats it, it’s ready to play!
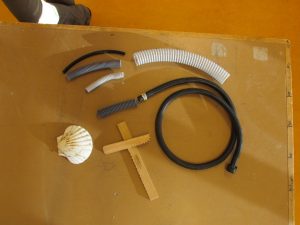
Our everyday life is full of objects that can be transformed into musical scrapers with a few tools:
- Tubes and corrugated pipes of all types
- Scallops etc.
- “Washboard” and other striated metal surfaces
For further information:

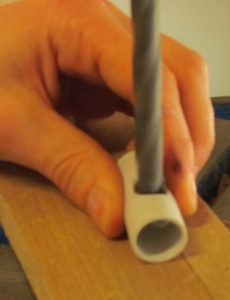
Harmonic pipe: a sufficiently long corrugated pipe (± 1 m) can very easily be (see video) transformed into harmonic pipe: wrap it onto itself and blow into one end or, if sufficiently flexible, twirl it in the air.
Instrument 2: OCARINETTE (tin can-ocarina)
Duration: 15 min / age: from age 8

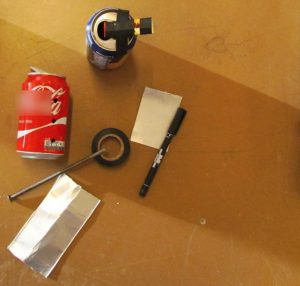 Recycled
- Aluminium Cans of all sizes
- Cardboard-aluminium (milk ot juice cartons …)
Tools
- Scissors
- Adhesive
- Carpenter’s nail or tip of a knife
- Marker pen
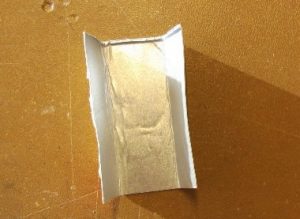
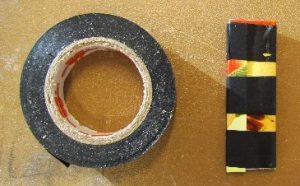
(1) Cut a square of cardboard-aluminum (± 6 x 6 cm), fold it in 3, and fold the sides together with adhesive tape to form an air channel.
/!\ Ensure that this channel is sufficiently open to ensure the passage of air (if necessary, pass a thin blade between the tongues to enlarge the opening).
(2) Place the air channel (without flattening it) on the metal ring of the can, facing the edge of the opening, and hold it with a length of adhesive.
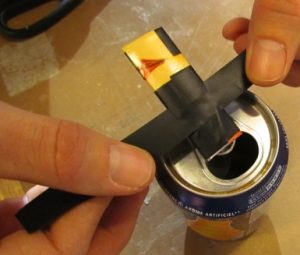
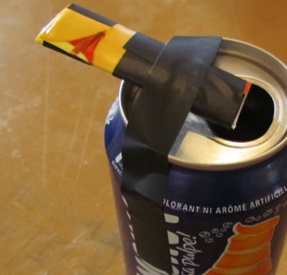
(3) Make your can sound by blowing gently into the air channel. If necessary, change the position or shape to obtain the clearest sound. If necessary, correct the position or shape to get the clearest sound.
(4) For greater range, we can pierce the can (like an ocarina) to obtain different pitches. For this, hold the can naturally and draw the imprint of the fingers using a marker.
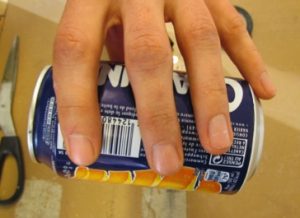
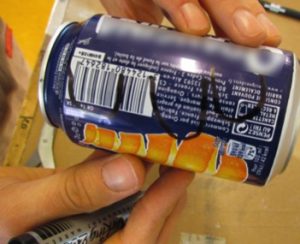
(5) All you have to do is drill the desired number of holes using a nail or a knife tip


Instrument 3: PAPER CLAVES ( + kazoo and papellophone)
Duration: 40 min / age: from age 12
Recycled
- Posters, wallpaper scraps etc. → paper as thick and smooth as possible!
Blown, struck, rubbed; like a kazoo or marimba, these claves offer a very wide range of playing modes!
Tools
- Pipe section (PVC or cardboard) Ø40mm
- Soap
- Measuring tape
- Adhesive
- Wallpaper paste
- Brush
- Marker pen
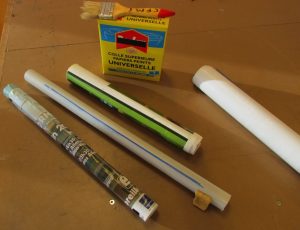
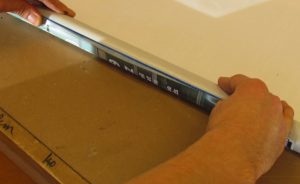
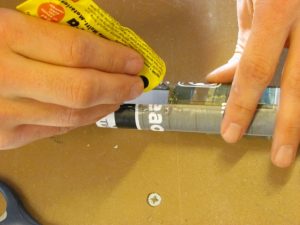
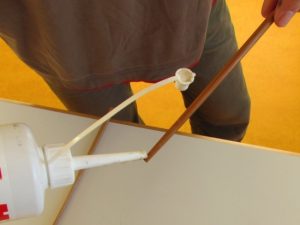
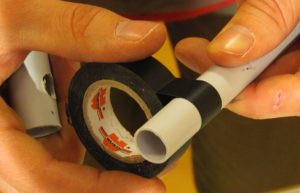
(1) Draw a line with the marker along the pipe’s length, and rub it with a piece of soap, so as to facilitate the release end of the operation (see photo presentation)
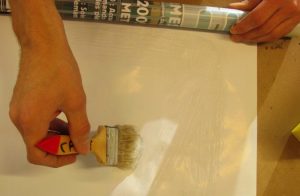
(2) Place the paper (wallpaper, or poster) along the line and start rolling.
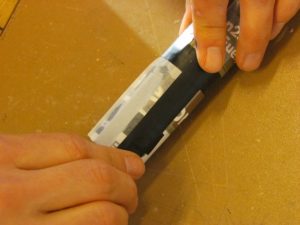
(3) After the 1st turn, brush the rest of the paper with wallpaper paste (prepared in advance) and continue winding squeezing the paper firmly
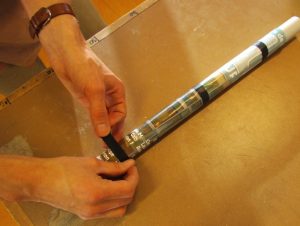
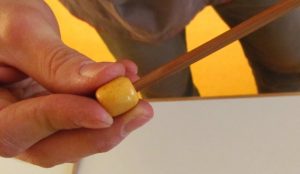
(4) Once the paper is completely rolled, secure it with tape and unmold it gently to let it dry (± 24h).
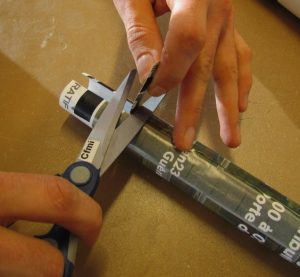
(5) Once the tubes are dry, cut sections of increasing size in order to have a complete range.
Indicative dimensions:
F 45.5 cm
G 40 cm
A 35.5 cm
Bb 33 cm
C 29.5cm
D 25 cm
E 22.4 cm
F 20.9 cm
For further information :

Mirliton: cut a small rectangle at the end of the tube and glue a sheet of cigarette paper to it.
Optional: add a horn (e.g. plastic bottle head) on the other side of the tube.
Papellophone: in the manner of a xylophone, assemble a range of claves in a cardboard box, using two elastic bands stretched over nails or wooden sticks
© Claves in paper + papellophone: idea and measurements from Max Vandervorst
VANDERVORST, M. Instruments de musique en papier et carton. Coll. Alternatives. Paris : Gallimard, 2014. P34-35 et 96-97
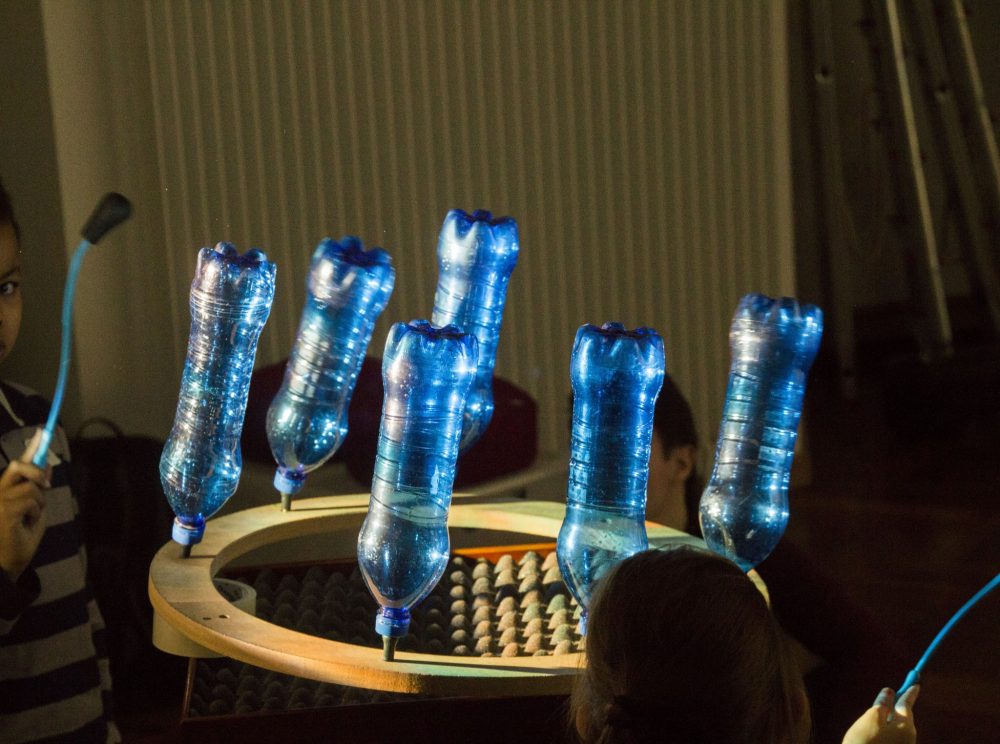
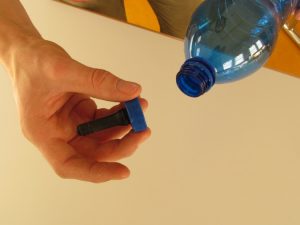
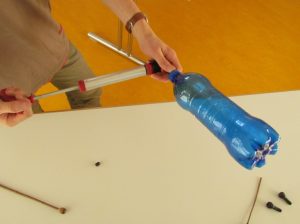
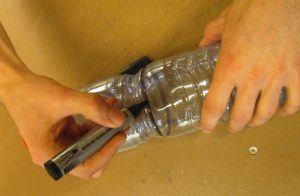
Instrument 4: BOTTLE-BELLS (pressurized cylinders)
Duration: 5 min / age: from age 15

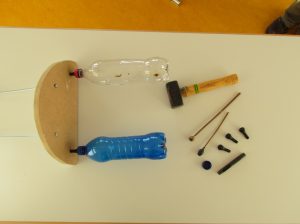
Recycled
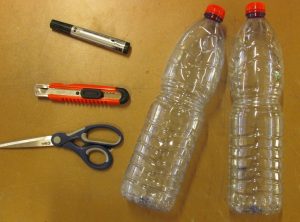
- Plastic soda or mineral water bottles
Tools
- Punch Ø14 mm
- Hammer
- Auto tubeless valves (type TR 414)
- Bicycle pump
Results vary (timbre, resonance, tuning stability over time etc.) depending on the brands and types of bottle chosen (eg Rozana, Coca-Cola etc.)
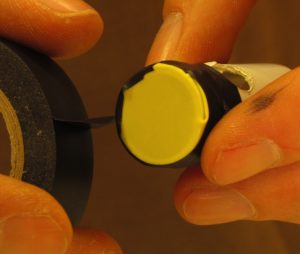
(1) Drill the cap using a punch
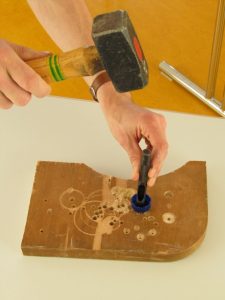
(2) Thread the valve through the inside of the cap as far as the sealing bead
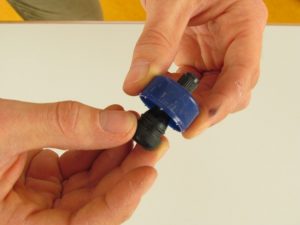
(3) Replace the cap and tune the bottle with a bicycle pump. To play, hold the bottles by the cap or place them on a stand.
© Bottles-bells: idea from Max Vandervorst and Jean Jeltsch
© Muriel de Poorter, Jean Jeltsch ALEx workshop, Lille CFMI + Lutheries Experimental Workshop
VANDERVORST, M. Lutherie sauvage : instruments de musique à inventer. Paris : Alternatives, 1997. P36-37.
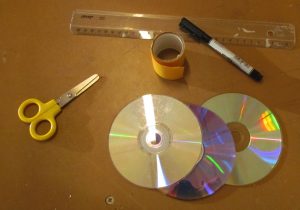
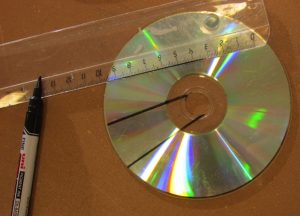
Instrument 5: CD-FLUTE
How to make a bevel (a “head” of flute) with used CDs
Duration: 20 min / age: from age 8
Recycled
- Used CDs & DVDs
- Various containers: tubes, jars, rollers, jars, etc.
This CD-flute will be transformed according to the body you give it: whistle, harmonic flute etc.

Tools
- Marker
- Ruler
- Round end scissors
- Double-sided tape
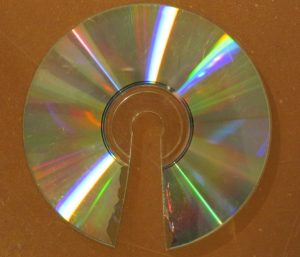
(1) Using a ruler and a marker, draw two straight lines slightly converging on either side of the central hole of the CD, and cut out the drawn section
(2) Place 3 double-sided strips on the contour of the cut-out section (/!\ The 3 strips must join together without overlapping) on both sides of the disc
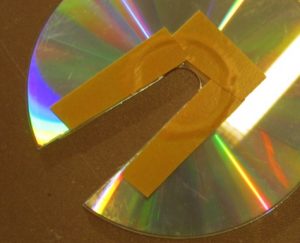
(3) On the 1st side, remove the film from the adhesive, and glue a 2nd CD with a slight offset letting the CD that has been cut out, show
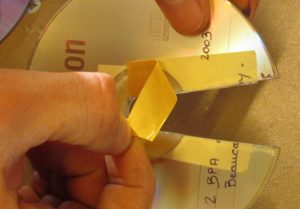
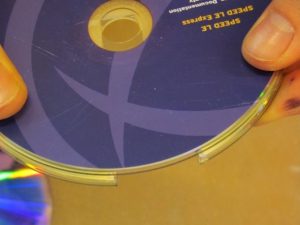
(4) Repeat the operation on the 2nd side so as to “sandwich” the cut CD

© Muriel de Poorter, Jean Jeltsch ALEx workshop, Lille CFMI + Lutheries Experimental Workshop
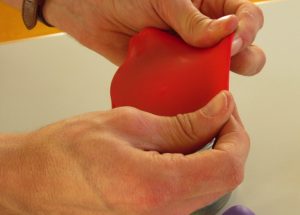
Instrument 6: POT-BALLOONS (+ shaker)
Duration: 5 min / age: from age 6
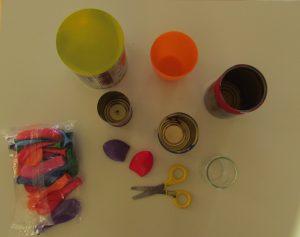
Recycled
- Cans, jars (yoghurt etc.) made from plastic, glass,pottery, metal etc.
These balloons are easy to use and are suitable for a multitude of play modes: blown, hit (hands or mallets), rubbed, or vibrated with the voice or the lips
Tools
- Scissors
- Balloons (size medium / large) premium quality
(1) Cut the head of the balloon
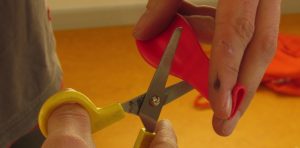
(2) Stretch the body of the balloon and stretch it over the opening of the pot or box, like a drum skin.
For further information :

Shaker : Fill your ballon-pots with rice, or other grain /!\Best results with small plastic pots
Instrument 7: MALLETS
Duration: 20 min / from age 12
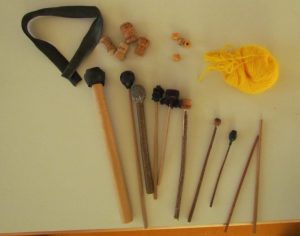
Recycled
- Sticks, thin stems and fine wooden branches
- Wooden beads
- Corks (champagne or cider type)
- Inner tube (cycling etc.)
- Wool
- Felt, textile waste etc.
Tools
- Wood glue
- Saw
- Auger
- File
- Knitting needle
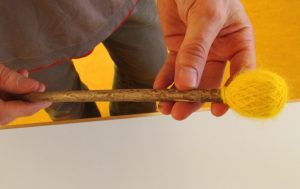
“Pearl” mallet
Apply wood glue on the end of a stick and affix a wooden bead (if necessary, enlarge the opening with a fine file). Allow to dry.
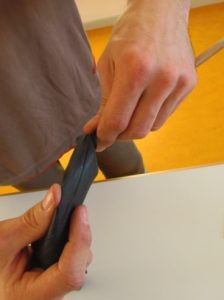
“Rubber” Mallets
Cut a long strip of tube and wrap tightly around the chosen stick, making sure that the layers are tight and regular. Snap the end under a previous layer to secure it.
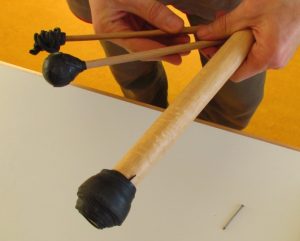
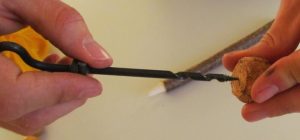
Woolen Mallets
Cut the cork and keep the convex top. Drill the centre with an awl. Fix this “head” on a stick with wood glue and let dry.
After drying, tying the wool yarn to the base of the head, to interlace it around the cork.
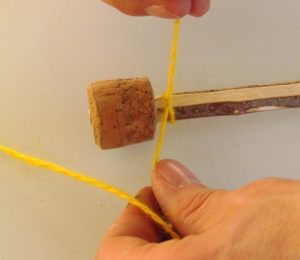
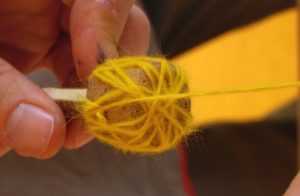
Finally, tie the wool yarn “crown” with the help of a knitting needle, both at the base of the head (all around the stick) and on the top (where the wool intersects).
Instrument 8: RECYCLED DRUM
Duration: 15 min / age: from age 6

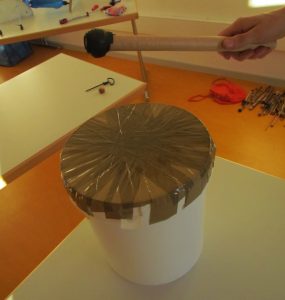
Recycled
- Bottles, buckets, garbage cans etc.
Tools
- Packaging adhesiveMake a “skin” for the drum using layers of interlaced wrapping tape.
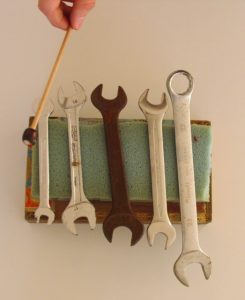
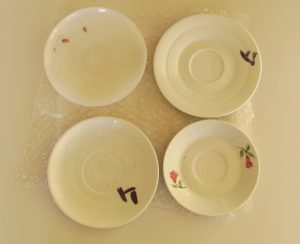
Instrument 9: RECYCLED CHIMES
Duration: 5 min / age: from age 6

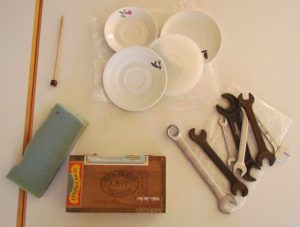
Recycled
- spanners
- dishes (plates, cups, bowls, lids, salad bowls, etc.)
- flower pots
- metal tubes, glass etc.
- stones, pebbles
- glass bottles or jars etc.
- foam, bubble wrap, polystyrene…
- small boxes (wood, cardboard etc.)
Make sound chimes very easily using everyday waste materials (dishes, crafts, natural elements etc.).
For best results, use a sounding board for your instruments (wooden boxes or cardboard for example) and a layer of foam or bubble wrap !
Instrument 10: COWBELLS (rattles)
Duration: 20 min / age: from age 12
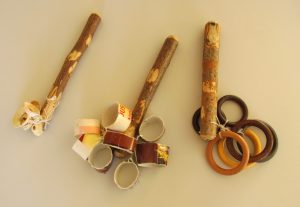
Recycled
- Thick wooden sticks and branches
- Wooden or metal curtain rings
- Shells
- Pieces of clay(flower pots)
- etc.
Tools
- Saw
- Drill (or awl): 1-2 mm
- Thread or fishing line
Saw a section of wood of the desired length (± 25 cm);
Drill 3 to 6 holes on the upper third of the handle;
Pass a string through each hole of ± 15-20 cm length;
Keep the string centred by tying it with a big knot on both sides of the handle;
Attach to each end of the string one selected sound materials.
Instrument 11: FLÛT'HORN (flute membrane)
Duration: 25 min / age: from age 15

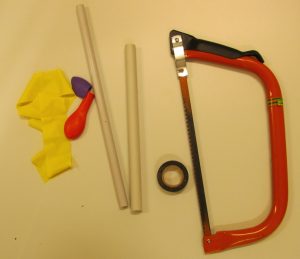
Tools
- Saw
- PVC pipe Ø 12 and 14 mm
- Drill
- Sandpaper
- Adhesive
- Thin membrane (balloon, latex glove etc.)
(1) Cut the two PVC pipes to the following lengths:
– Inner tube (Ø mm):
– Outer pipe (Ø mm):
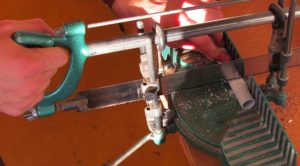
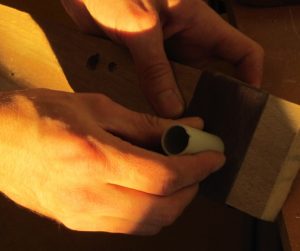
(2) Sand the ends of the two pipe sections to remove dust
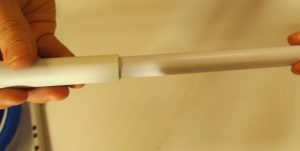
(3) Drill a Ø mm hole in the middle of the outer pipe and clean the hole. This section will serve as a mouthpiece.
(4) Surround the inside pipe (which will form the body of the flute) with several turns of adhesive to cm from the end.
This adhesive must make it possible to seal the section that will receive the mouthpiece.
Ensure that it can be inserted without forcing it and, if necessary, add or remove adhesive.
(5) Drill the body of the flute with the desired number of holes.
Indicative measures (minor scale)
Holes must be Ø 8 mm; measurements from the upper end
Back
Thumb 17 cm
Front face
F 19.3 cm C 27.3 cm
E 20.8 cm Bb 31.3 cm
D 23.9 cm A 33.3 cm
G 37.9 cm
Tip : Transfer these measurements (including the ends of the flute) to the marker on mid-stretched elastic. It will be possible by increasing or decreasing the tension of the elastic to transpose the measures to flutes of larger or smaller dimensions
(6) Tension a piece of membrane on one end of the mouthpiece and hold it with adhesive.
(7) Slide the mouthpiece over the body of the flute until the inner pipe is visible against the membrane.
(8) Attach the second end of the mouthpiece to the body of the flute with adhesive. Blow into the mouthpiece to ensure the correct vibration of the diaphragm. If necessary, slightly adjust the position of the mouthpiece.
(9) Optional: add a bell to the end of the flute
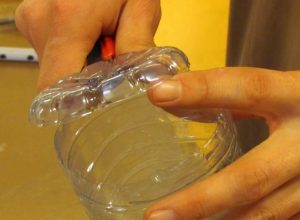
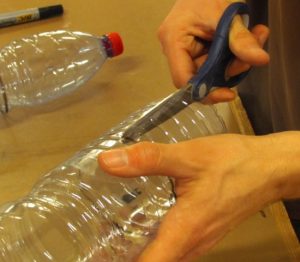
Instrument 12: BOTTLE-SPIDERS (or agitophones)

Recycled
- 1.5L striped plastic bottles (can be adapted to non-striped and / or different volume bottles)
Tools
- Scissors
- Craft knife
- Marker pen
The principle of spider bottles is to cut fringes of the same length (in the manner of spider’s legs) around the whole bottle. The longer these fringes, the more serious the bottle will sound when it is agitated or hit.
Indicative dimensions (length of fringe)
C 16 cm G 11 cm
D 15 cm A 11 cm (without cap)
E 12.5 cm B 10 cm (without cap)
F 11.5 cm C 8.5 cm (without cap)
(1) Cut the bottom of the bottle using a craft knife
(2) Draw a mark with the marker corresponding to the length of the fringe to be cut
(3) Cut 1 cm wide fringes around the bottle
© Bouteille-spiders: dimensions from Max Vandervorst
VANDERVORST, M. Lutherie sauvage : instruments de musique à inventer. Paris : Alternatives, 1997. P24.
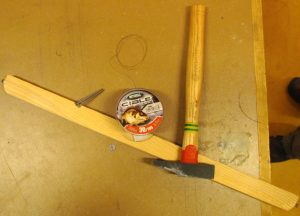
Instrument 13: MAKESHIFT BOW
Duration: 20 min / age: from age 12
Recycled
- Wooden laths 30 to 60 cm in length
- Wine corks
Tools
- Hammer
- Medium nails
- Vise
- Fishing line (30/100 or larger)
- Abrasive paper
- Rosin
(1) If necessary, saw the battens to the desired length
(2) Sand the ends and a little round the corners
(3) Hammer a nail in the middle of each end
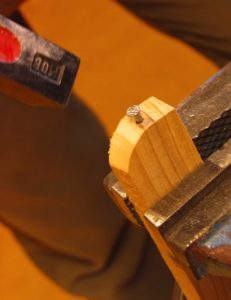
(4) Firmly tie the fishing line to one end
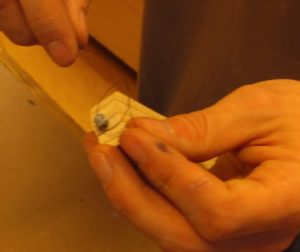
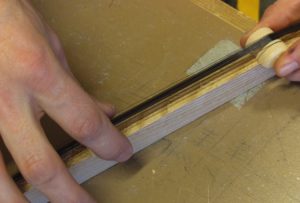
(5) Tighten an many lengths of yarn between the two nails and finish with a solid knot.
(6) Cut a cork 4 ways (once the length and once in the width). Place one of these cork pieces between the wood and the wire at each end of the bow; these allow you to adjust the thread tension.
(7) Loosen the wire to apply the rosin (by rubbing it against the wire). /!\ A large amount of rosin may be necessary to ensure adhesion of the bow.
For further information :
Use this bow with a makeshift violin or a nail violin!

Competencies
The pupils are able to:
- build their own instruments.
Materials
References
(03) Claves en papier + papellophone : idée et mesures d’après Max Vandervorst
VANDERVORST, M. Instruments de musique en papier et carton. Coll. Alternatives. Paris : Gallimard, 2014. P34-35 et 96-97
(04) Bouteilles-cloches : idée d’après Max Vandervorst et Jean Jeltsch
VANDERVORST, M. Lutherie sauvage : instruments de musique à inventer. Paris : Alternatives, 1997. P36-37.
(12) Bouteilles-araignées : dimensions d’après Max Vandervorst
VANDERVORST, M. Lutherie sauvage : instruments de musique à inventer. Paris : Alternatives, 1997. P24.
To go further :
ARMENGAUD, Christine. La musique verte. Le Puy : C. Bonneton, 1979. 93p.
BLANDY, Bruno. Rékupertou : 37 instruments sortis des poubelles. Lyon : ed. Lugdivine, 2008. 56p.
CLODORE-TISSOT, Tinaig. L’atelier nature : petit guide de la lutherie en herbe. Lyon : ed. Lugdivine, 2014. 87p.
DURIN, Serge. Jouets sonores : amb lo cabreton. Orlhac : Ostal del Libre, 1996. 175p.
HOPKIN, Bart. Making Simple Musical Instruments: A Melodious Collection of Strings, Winds, Drums & More. Asheville : Lark Books, 1999. 144p.
HOPKIN, Bart. Making Musical Instruments with Kids: 67 Easy Projects for Adults Working with Children. Tucson : See Sharp Press, 2009. 152p.
JELTSCH, Jean. DE POORTER, Muriel. Construire sa musique : fabriquer des aérophones avec embouchures et becs plastique. Lyon : ed. Lugdivine, 2015. 67p.
MARTINI, Ulrich. Musikinstrumente erfiden, bauen, spielen : Anleitungen und Vorschläge für die pädagogische Arbeit. Stuttgart : Klett, 1980. 142p.
NOCLIN, Olivier. L’atelier instrumental. Lyon : ed. Lugdivine, 2004. 56p.
Module Overview |